How To Photograph Architecture Without Distortion
A practical step-by-step guide to how to photograph architecture without distortion, including preparation, instructions, common issues, tips, and next steps.
How To Photograph Architecture Without Distortion
This guide explains how to approach how to photograph architecture without distortion, including the preparation, practical steps, common mistakes, and final checks that help you finish with confidence.
Before You Start
Step-by-Step Instructions
Quick Reference
Common Problems When You Photograph Architecture Without Distortion
Even with careful planning, you might run into a few common issues when trying to photograph architecture without distortion. Here’s how to identify and fix them:
Converging Verticals (Keystoning)
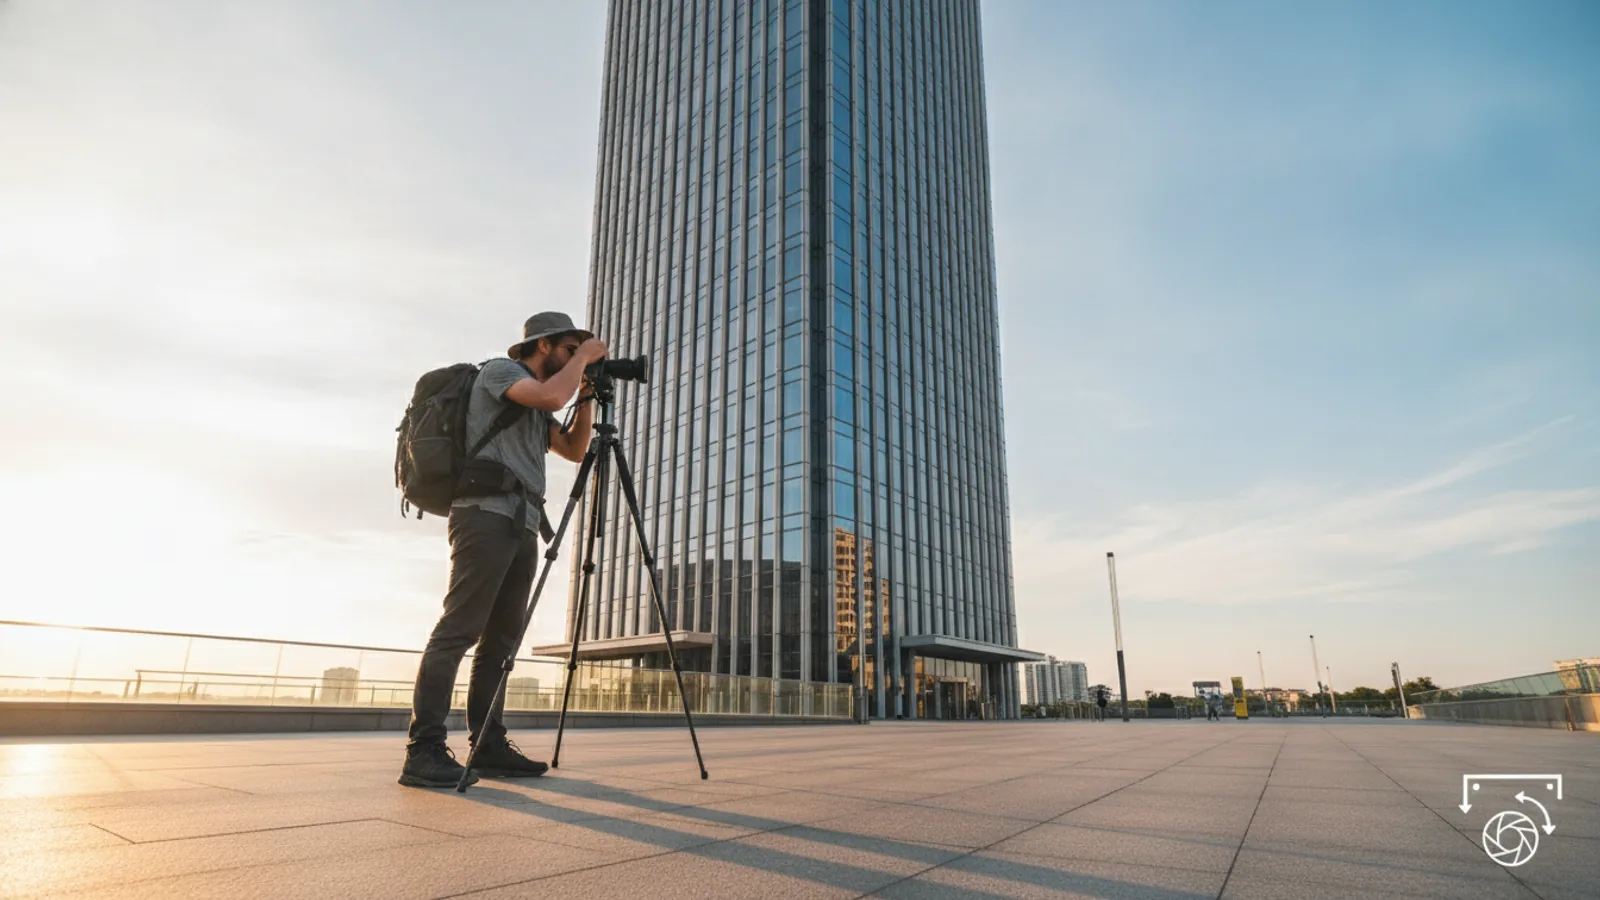
This is by far the most frequent problem. It happens when you point your camera upwards to fit a tall building into your frame, causing the building's sides to appear to lean inward towards the top. It looks like the building is wider at the bottom and narrower at the top, or even falling over.
- Fix in the Field: The best fix is to avoid tilting the camera upwards in the first place. Move further back from the building. If possible, find an elevated viewpoint that puts your camera closer to the mid-point of the building's height. Use a tilt-shift lens if you have one.
- Fix in Post-Processing: Use the "Vertical" slider in your editing software's "Transform" panel (e.g., Lightroom). You can also use the "Guided Upright" tool, which allows you to draw lines along the distorted verticals, and the software will automatically straighten them. Remember that this will often require cropping your image.
Barrel Distortion
Barrel distortion is a type of optical distortion commonly found in wide-angle lenses. It makes straight lines appear to bulge outwards, like a barrel. This is especially noticeable with lines near the edges of your photograph.
- Fix in the Field: Try to use a less wide-angle lens if you can, or zoom in slightly if using a zoom lens. Some modern cameras have in-camera lens correction settings that can help reduce this for JPEG files.
- Fix in Post-Processing: Most modern editing software has built-in lens profiles. In Lightroom, for example, go to the "Lens Corrections" panel and check "Enable Profile Corrections." The software will automatically detect your lens and apply the appropriate corrections to flatten those bulging lines.
Pincushion Distortion
This is the opposite of barrel distortion, where straight lines appear to bend inwards, like a pincushion. It's less common in architectural photography but can sometimes be seen with telephoto lenses.
- Fix in the Field: Similar to barrel distortion, try a different focal length or a different lens if possible.
- Fix in Post-Processing: Again, using the "Enable Profile Corrections" in your editing software's "Lens Corrections" panel will usually fix pincushion distortion automatically by applying the correct lens profile.
Poor Horizontal Leveling
Sometimes you fix the converging verticals, but then notice that the entire building or horizon line is slightly tilted to one side. This happens if your camera wasn't perfectly level horizontally.
- Fix in the Field: Always use your camera's electronic level or a hot shoe bubble level to ensure your camera is perfectly level on both axes before you take the shot.
- Fix in Post-Processing: Use the "Rotate" or "Level" tool in your editing software. Most programs have a tool where you can draw a line along a known straight horizontal (like the horizon or the base of a building) and it will automatically straighten the image.
Advanced Tips for How To Photograph Architecture Without Distortion
Once you've mastered the basics, here are some advanced techniques to take your distortion-free architectural photography to the next level:
Consider a Tilt-Shift Lens
As mentioned earlier, a tilt-shift (TS) lens is the ultimate tool for architectural photographers. These specialized lenses allow you to "shift" the lens elements up or down, left or right, independently of the camera body. This means you can keep your camera perfectly level (preventing keystoning) while still capturing the entire height of a tall building by shifting the lens upwards. TS lenses also typically have extremely low optical distortion, making them ideal for precise work. They can be expensive, but if you're serious about architectural photography, they are a worthwhile investment.
Use a Geared Tripod Head
While a standard ball head tripod is good, a geared head offers much finer control. Each axis (pan, tilt, and sometimes rotation) has its own gear-driven knob, allowing for incredibly precise micro-adjustments. This is invaluable when you're trying to line up perfect vertical and horizontal lines in your composition. It takes a little longer to set up but pays off in accuracy.
Focus Stacking for Maximum Sharpness
When photographing large buildings, especially if they have intricate details at different depths, it can be hard to get everything perfectly sharp from front to back with a single shot. Focus stacking involves taking multiple photos of the same scene, each focused on a different part of the building (e.g., one on the front details, one on the middle, one on the background). These images are then combined in post-processing (using software like Photoshop or Helicon Focus) to create a single image that is sharp throughout.
Exposure Bracketing and HDR
Architectural scenes often have high contrast, with bright skies or sunlit facades and deep shadows in alcoves or interiors. To capture detail in both highlights and shadows without distortion, use exposure bracketing. This means taking several photos of the same scene at different exposures (e.g., one normal, one underexposed, one overexposed). These can then be merged into a High Dynamic Range (HDR) image in post-processing. Make sure to shoot on a tripod to ensure all bracketed shots align perfectly.
Reference Lines and Grids
When composing your shot, use your camera's grid overlay (most cameras have this option) to help align your verticals and horizontals perfectly. In post-processing, you can also overlay a grid in your editing software to fine-tune your perspective corrections. This provides a clear visual guide for ensuring all lines are true and parallel.
Shoot in RAW Format
Always shoot in RAW format instead of JPEG when photographing architecture. RAW files contain much more image data, giving you greater flexibility and quality when making corrections in post-processing. JPEGs are compressed and lose information, which can make aggressive distortion corrections look less natural or introduce artifacts.
How To Photograph Architecture Without Distortion FAQ
Q: Can I really get distortion-free photos with just a smartphone?
A: Yes, it's possible, especially with newer smartphones that have advanced camera systems and built-in leveling tools. The key principles of keeping the camera level and using editing apps to correct perspective still apply. Many smartphone editing apps have basic perspective correction features. However, phone cameras often have very wide-angle lenses, which can introduce more optical distortion than a dedicated camera lens.
Q: What if I can't move far enough back from a building?
A: This is a common challenge in urban environments. If you can't move back, try to find an elevated position (like a nearby parking garage, bridge, or another building) to shoot from. If neither is possible, you will have to tilt your camera upwards, accepting that there will be converging verticals, and plan to correct them extensively in post-processing. Shoot slightly wider than needed to allow for the cropping that happens during perspective correction.
Q: How much should I correct in post-processing?
A: The goal is to make the architecture look natural and true to life. Over-correcting can sometimes make a building look stretched or unnatural. Use the grid overlay in your editing software and trust your eyes. If the vertical lines look parallel and the building appears well-proportioned, you've likely found the right balance. Sometimes, a very slight amount of distortion can be left if it feels more natural than perfectly straightened lines, but for a "without distortion" goal, aim for perfection.
Q: Is a tilt-shift lens always necessary for architectural photography?
A: No, it's not always necessary, especially if you're starting out or if your budget is limited. Excellent distortion-free architectural photos can be achieved with a good standard lens, a tripod, careful leveling, and effective post-processing techniques. A tilt-shift lens simply makes the process much easier and more precise in the field, reducing the need for heavy post-processing corrections.
Q: Does lens choice affect distortion more than camera position?
A: Both are very important but affect different types of distortion. Camera position primarily affects perspective distortion (converging verticals). Tilting your camera will always introduce this. Lens choice primarily affects optical distortion (barrel or pincushion). A high-quality lens will have less of this, but even the best wide-angle lenses can show some. For perfectly straight lines, you need to manage both aspects.
Final Checklist for How To Photograph Architecture Without Distortion
Before you pack up your gear or finalize your edits, run through this checklist to ensure you've covered all the bases for distortion-free architectural photography:
- ✓ Have I moved as far back as possible from the building?
- ✓ Is my camera perfectly level horizontally and vertically using a spirit level or electronic level?
- ✓ Is my camera positioned as close to the mid-point of the building's height as possible?
- ✓ Am I using a standard or short telephoto lens, or a tilt-shift lens if available?
- ✓ Is my camera firmly mounted on a sturdy tripod with all locks tightened?
- ✓ Have I shot in RAW format to maximize editing flexibility?
- ✓ Have I applied lens profile corrections in my editing software to fix barrel/pincushion distortion?
- ✓ Have I used the perspective transformation tools (e.g., vertical slider, guided upright) to straighten converging lines?
- ✓ Have I used a grid overlay in post-processing to visually confirm straight lines?
- ✓ Have I reviewed the final image on a large screen to ensure all lines are perfectly straight and the building looks natural?
- ✓ Have I cropped the image if necessary after perspective corrections?